

 English
 Español
 عربى







Content
- 1 What You Need Before You Start
- 2 Clearances and Measurements: Set These First
- 3 Ducted or Recirculating: Choose the Venting Path
- 4 Step-by-Step Installation
- 5 Electrical Requirements: Do Not Share a Circuit
- 6 Common Installation Mistakes and How to Avoid Them
- 7 When to Call a Professional
- 8 Frequently Asked Questions
- 8.0.1 Q1: Can I install an over-the-range microwave myself?
- 8.0.2 Q2: What is the minimum distance between the stove top and an over-the-range microwave?
- 8.0.3 Q3: Do I need a dedicated circuit for an over-the-range microwave?
- 8.0.4 Q4: Can an over-the-range microwave be vented through the wall?
- 8.0.5 Q5: What size microwave fits above a standard 30-inch range?
- 9 Final Pre-Use Checklist
An over-the-range microwave has three jobs: save counter space, vent cooking fumes, and survive the heat directly above the stove. That is why installing it is less forgiving than a countertop unit. Set it too low and you risk heat damage and code violations; miss the studs and it will sag; get the ducting wrong and grease recirculates into the kitchen. Done correctly, the job takes two people, basic tools, and roughly one hour of hands-on work, plus another hour for measuring, wiring, and vent preparation.
What You Need Before You Start
The most common failure in an over-the-range microwave installation is mechanical. Installers who skip the stud check end up with a 50 to 80 pound appliance held by drywall anchors that were never rated for the load. Confirm first that the upper cabinet and the wall behind it can support the unit's weight.
- Stud finder with AC wire detection
- Tape measure and pencil
- 4-foot level
- Cordless drill with hex bits and a 1-1/2 inch hole saw
- Socket wrench or adjustable wrench
- 1/4 inch lag bolts and toggle bolts as backup
- Metal foil duct tape and duct clamps
- Safety glasses and work gloves
- A second person, which is non-negotiable
The mounting plate ships with the unit. Push upward on the cabinet bottom to confirm it is fixed to the wall; if the face frame moves, re-secure it first. Most 30-inch units need a cabinet opening about 30 inches wide and 16 to 17 inches deep. If the appliance is still being selected, verify the cut-out dimensions in the manual before any cabinet work begins.
Clearances and Measurements: Set These First
Set the clearance before you mark a single screw hole. Everything else in the job follows from that number: the mounting plate height is determined by how far the microwave bottom must sit above the cooking surface.
| Installation point | Typical requirement |
|---|---|
| Electric cooktop to microwave bottom | 30 in. minimum |
| Gas cooktop to microwave bottom | 30 to 36 in., depending on range model and local fuel-gas code |
| Wall cabinet opening width | 30 in. standard |
| Power cord hole in upper cabinet | 1-1/2 in. diameter or as stated in the manual |
| Typical installed weight | 50 to 80 lb (23 to 36 kg) |
With a gas range, the fuel-gas code often overrides the microwave manual. If the microwave manual says 30 inches and the local code says 36, you use 36; the stricter requirement wins.
Blindly applying a "standard" clearance is where most retrofits fail. A 36-inch gas range with high-BTU burners throws far more heat upward than a 24-inch electric cooktop. The 30-inch rule is a floor, not a ceiling.
Confirm the same clearance logic for any exhaust device in the space. We explain the height relationship between cooking surfaces and ventilation equipment in our guide to optimal range hood height above the cooktop, because the same principle applies to over-the-range microwaves.
Ducted or Recirculating: Choose the Venting Path
Every over-the-range microwave includes a blower, but the blower only performs if the air has somewhere to go. Ducted venting moves grease-laden air outside through metal duct; recirculating venting pushes air through a charcoal filter and back into the room. Ducted is the better choice for most kitchens, and many local codes require it above gas ranges.
| Factor | Ducted (vented outside) | Recirculating |
|---|---|---|
| What it removes | Grease, moisture, and smoke | Only grease that reaches the filter |
| Filter type | Mesh aluminum filter | Mesh aluminum plus charcoal filter |
| Installation effort | Higher, with a duct run | Lower, no exterior duct |
| Best location | Exterior wall or roof access | Apartments, interior walls, retrofits |
If the duct run is longer than a few feet, use rigid metal duct instead of flexible foil; a long flexible run can cut airflow by half and collect grease. Keep the run straight, and cap the exterior end with a backdraft damper.
If the kitchen already has a ducted range hood, a second strong blower in the microwave may be redundant. In that layout, a wall-mount range hood handles the heavy ventilation and the heating appliance can sit out of the heat zone.
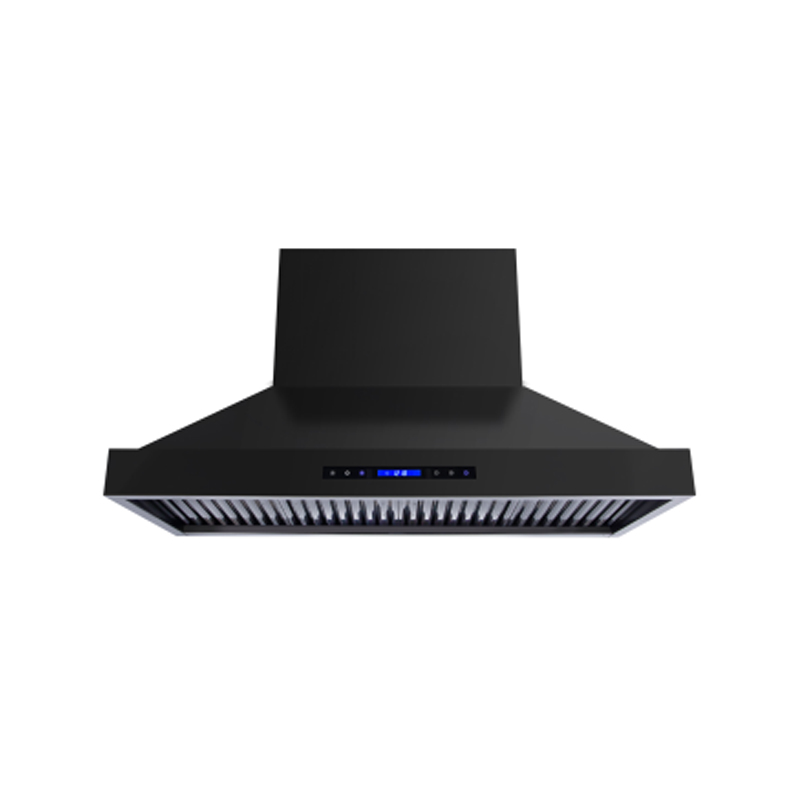 Reidom 36-Inch Wall Mount Tower Range Hood with Touch ControlsThis stainless steel wall-mounted hood offers powerful suction and washable baffle filters, making it a suitable ventilation choice for kitchens where the heating appliance is separate from the range hood.View Product →
For tight kitchens where an over-the-range microwave does not fit, a built-in microwave oven mounted below counter level or in a tall cabinet keeps heating and venting functions separate. Each device then does its job without compromise.
When comparing built-in options, look at usable cavity size, door swing, and trim style rather than exterior width alone. Sensor cooking and even heat distribution matter more than knob layout; we cover the essentials in our article on features to look for in a built-in microwave.
Step-by-Step Installation
Do the mechanical work in this order: plate, damper, power, then lift. There is no shortcut that keeps a 70-pound microwave level on the first attempt.
- Kill the power. Turn off the circuit breaker for the kitchen or the dedicated microwave outlet, and confirm with a non-contact voltage tester.
- Mark the center line. Measure the range width and mark the center point on the back wall and under the upper cabinet; the symmetric mounting width depends on this line.
- Locate the studs. Use an electronic stud finder to mark the edges of at least two studs in the mounting zone, and write the positions on the wall.
- Prepare the upper cabinet. Drill the power cord hole, usually 1-1/2 inches in diameter, through the cabinet bottom or back. If the unit vents through the cabinet, cut the duct opening and install the transition.
- Mount the plate. Hold the mounting plate on the center line, level it, and drive lag bolts into the studs. Recheck level after each screw; the plate is the foundation of the installation.
- Install the damper and duct adapter. Attach the damper on top of the microwave so it opens freely toward the exterior duct. For wall venting, remove the top knockout and fit the rear adapter.
- Run the duct. Connect the duct from the adapter to the exterior cap, keeping the run short and straight. Clamp every joint and seal it with metal foil tape.
- Lift and hook. With the helper supporting the front, tilt the microwave and hook the two rear slots onto the mounting plate tabs. Push the body flat against the wall and check that the bottom edge is parallel to the cooktop.
- Secure the unit. Drive the supplied screws through the top of the microwave into the upper cabinet, and tighten the bottom bolts if the model has them. The unit must not rock when you pull the front edge.
- Connect power and test. Plug in or hardwire, restore power, and test the light, the fan at both speeds, and the turntable. Close the door and confirm an even seal on all sides.
Most over-the-range microwaves are 120-volt, 60-hertz units drawing 9 to 15 amps. Use a dedicated 15- or 20-amp circuit from the panel to the receptacle in the upper cabinet. Sharing a circuit with countertop appliances only creates nuisance trips when you need the microwave most.
The receptacle belongs inside the upper cabinet, not behind the microwave, so you can reach it for service without pulling the appliance. In many jurisdictions, a receptacle serving only a dedicated appliance is exempt from the GFCI rule for countertop outlets, but check with the local inspector. Never run a power cord inside a wall cavity; extend the wiring with a surface-mount junction box if needed.
Common Installation Mistakes and How to Avoid Them
Most service calls for over-the-range microwaves trace back to five fixable errors. Avoiding them takes a few minutes during installation and saves hours afterward.
| Mistake | Consequence | Prevention |
|---|---|---|
| Mounting plate anchored to drywall only | Sagging unit, misaligned door, fall risk | Lag bolts into studs or solid wood blocking |
| Ignoring the cooktop clearance | Heat damage, code violation, voided warranty | Use the stricter of the manual or local code |
| Unlevel mounting plate | Door does not seal, rattles, uneven cooking | Check level after every screw |
| Long flexible duct run | Low airflow, grease buildup, poor venting | Use rigid metal duct with short straight runs |
| Damper installed backwards | Reduced exhaust, moisture buildup, noise | Confirm the flap opens toward the exterior duct |
One phrase to keep in mind: if it moves, it was not secured. A microwave that shifts when you push the front corner is a microwave that came off the plate the same way it went on.
When to Call a Professional
The installation itself is doable, but the surrounding work is not always. Call an electrician if the circuit cannot handle a dedicated microwave line or the wiring is ungrounded. Call a gas professional if the range or gas line must be moved. Call a contractor if the duct path cuts through structural framing.
For kitchen contractors and equipment buyers, the professional shortcut is specification: verify the cut-out dimensions and venting direction of the exact model before the order is placed. When every unit shares the same mounting pattern, crews finish faster with fewer callbacks.
Frequently Asked Questions
Q1: Can I install an over-the-range microwave myself?
Yes, with two people and basic tools, provided the wall cabinet is solidly anchored and a 120-volt circuit is available. The riskiest part is lifting the unit onto the mounting plate; a dropped unit can damage the cabinet, the range, or the appliance itself.
Q2: What is the minimum distance between the stove top and an over-the-range microwave?
Most manufacturers specify at least 30 inches from the top of an electric cooking surface to the bottom of the microwave. Gas ranges often require 30 to 36 inches, depending on the range manufacturer and the local fuel-gas code. When the numbers differ, use the taller requirement.
Q3: Do I need a dedicated circuit for an over-the-range microwave?
Yes, a dedicated 15- or 20-amp, 120-volt circuit is strongly recommended. Over-the-range microwaves typically draw 9 to 15 amps, and a shared circuit can trip when other kitchen appliances are running at the same time.
Q4: Can an over-the-range microwave be vented through the wall?
Yes, if the model supports rear venting. Remove the top knockout, fit the rear adapter, and run rigid metal duct straight out through the exterior wall. Keep the duct run short; most manufacturers recommend no more than 15 to 20 equivalent feet for acceptable airflow.
Q5: What size microwave fits above a standard 30-inch range?
A standard over-the-range microwave body is about 30 inches wide, 16 to 17 inches deep, and 16 to 18 inches tall. A 30-inch upper cabinet with a matching opening fits most units, but individual models vary, so confirm the cut-out dimensions in the manual before purchase.
Final Pre-Use Checklist
Take ten minutes before you rely on the microwave for daily cooking. A quick walkthrough catches the small details that cause the biggest complaints.
- The unit is level and the door seal is even on all sides.
- The cooktop-to-microwave clearance matches the stricter of the manual or local code.
- Mounting screws are in studs and the top screws pass through the cabinet.
- The power cord is not pinched, and the outlet stays accessible.
- Duct joints are clamped and the damper opens freely.
- The light, fan at both speeds, and turntable were tested before closing the cabinet.
Once those checks pass, the microwave is ready for daily service, and the kitchen keeps its counter space and its ventilation in the same package.
