

 English
 Español
 عربى
عربى







Content
- 1 Understanding Built-In Range Hood Inserts
- 2 Why Integrated Ventilation Matters in Custom Kitchen Design
- 3 Choosing the Right Insert Size for the Cooktop
- 4 Cabinet for Range Hood: Structural and Clearance Requirements
- 5 Airflow and CFM Planning for Integrated Systems
- 6 Materials: Matching Inserts to Custom Cabinetry
- 7 Installation Process Overview
- 8 Noise, Filtration, and Maintenance Considerations
- 9 Design Tips for a Truly Seamless Integrated Look
- 10 Frequently Asked Questions
- 10.0.1 Q1: What is the difference between a built in range hood and a standard wall hood?
- 10.0.2 Q2: Can an insert range hood 30 unit be used with a wider cooktop?
- 10.0.3 Q3: Does the cabinet around the insert need special ventilation of its own?
- 10.0.4 Q4: How much clearance is typically needed above a gas cooktop?
- 10.0.5 Q5: Is a custom wood hood liner as effective as an exposed metal front?
Understanding Built-In Range Hood Inserts
A built in range hood insert is a ventilation unit designed to be concealed inside custom cabinetry rather than standing as a visible appliance on its own. Instead of a bulky metal canopy hanging over the cooktop, the insert sits within a wood, stone, or plaster shell that matches the rest of the kitchen. The blower, filters, and control panel are fully contained within the insert body, while only the front trim or grille remains visible once the cabinet for range hood is installed around it.
This approach has become a defining feature of custom kitchen design because it allows the ventilation system to disappear visually while still delivering commercial-level airflow. Designers can shape the surrounding cabinet in almost any form, from a simple rectangular box to a sculpted curved chimney, without being limited by the shape of a standard decorative hood.
Key takeaway: An insert range hood 30 or larger unit is chosen based on cooktop width and blower capacity, then wrapped in a custom-built enclosure that becomes part of the cabinetry rather than a separate appliance.
Why Integrated Ventilation Matters in Custom Kitchen Design
Open-concept kitchens have made ventilation performance a design priority rather than an afterthought. When the kitchen is visible from the living and dining areas, cooking odors, grease particles, and steam need to be captured quickly and quietly. A built in vent hood addresses this by combining strong extraction with a form that blends into millwork, so the kitchen keeps a clean architectural line even when the ventilation system is working at full capacity.
- Odor and grease particles are pulled away from the cooking surface before they spread into adjoining rooms.
- The cabinetry above the cooktop can match adjacent storage units, creating a continuous visual rhythm across the wall.
- Insert-based systems typically allow higher airflow ratings than many decorative hoods of the same width, since the blower is not constrained by a thin decorative shell.
- Maintenance access, such as filter removal, is designed into the front panel rather than requiring the whole hood to be dismantled.
Choosing the Right Insert Size for the Cooktop
Sizing is the first technical decision in any project involving a built in range hood. The insert should generally match or exceed the width of the cooktop or range below it, since airflow capture drops sharply when the hood is narrower than the heat source. The table below outlines common insert widths and the cooktop configurations they typically serve.
| Insert Width | Typical Cooktop Match | Common Airflow Range |
|---|---|---|
| 30 inches | 4-burner cooktop or standard range | 400 to 600 CFM |
| 36 inches | 5-burner cooktop or wide range | 600 to 900 CFM |
| 42 inches | Professional-style range with griddle | 900 to 1200 CFM |
| 48 inches and above | Dual-fuel or commercial-style range | 1200 CFM and above |
An insert range hood 30 unit remains one of the most requested sizes for standard kitchens, since it aligns with the most common cooktop width found in mid-size homes. Larger inserts are typically reserved for kitchens with professional-style ranges or island cooktops that generate more steam and heat across a wider cooking surface.
Cabinet for Range Hood: Structural and Clearance Requirements
Because the insert is hidden inside custom millwork, the surrounding cabinet must be engineered around specific clearance and airflow rules. The enclosure is not purely decorative; it has to accommodate duct routing, heat dissipation, and service access. The diagram below shows a simplified cross-section of a typical cabinet built around a range hood insert.
Several structural points should be confirmed before the cabinet box is built:
- Vertical clearance between the cooktop and the bottom of the insert should follow the manufacturer specification, typically between 24 and 36 inches depending on fuel type.
- The cabinet interior needs enough depth to allow the ductwork to bend toward the exterior wall or roofline without sharp angles that reduce airflow efficiency.
- A service panel or removable section should be planned so filters and the blower can be accessed without dismantling the cabinet face.
- Heat-resistant backing material is recommended directly behind and above the insert, even when the surrounding cabinetry is wood, to protect the structure from prolonged heat exposure.
Airflow and CFM Planning for Integrated Systems
Cubic feet per minute, or CFM, describes how much air the blower moves, and it is the primary performance figure to plan around. A rough guideline used by many kitchen designers is to allow roughly 100 CFM for every 10,000 BTUs of cooking output on a gas range, or to size electric and induction setups based on cooktop width rather than heat output. Because insert range hoods are hidden inside cabinetry, airflow planning also has to account for duct length and the number of bends between the insert and the exterior vent.
| Duct Condition | Effect on Airflow | Planning Adjustment |
|---|---|---|
| Straight run under 10 feet | Minimal airflow loss | Standard blower rating is usually sufficient |
| Multiple 90-degree bends | Noticeable static pressure increase | Choose a higher CFM blower or a remote inline blower |
| Long horizontal run over 20 feet | Reduced effective extraction at the cooktop | Increase duct diameter and blower capacity together |
For kitchens where the insert sits far from an exterior wall, a remote or inline blower is often mounted closer to the exit point, with only the intake portion of the built in vent hood remaining inside the cabinet. This keeps the visible portion of the system quiet while preserving strong extraction performance.
Materials: Matching Inserts to Custom Cabinetry
The insert itself is almost always constructed from stainless steel or a similar corrosion-resistant metal, since it sits closest to heat, grease, and moisture. The visible shell around it, however, can be finished in wood, painted panels, plaster, or stone veneer to match the rest of the kitchen. A custom wood hood liner is a common choice for warm, traditional kitchens, while a fully Stainless Steel Kitchen finish is often selected for a more industrial or contemporary look where the hood face is left exposed rather than concealed.
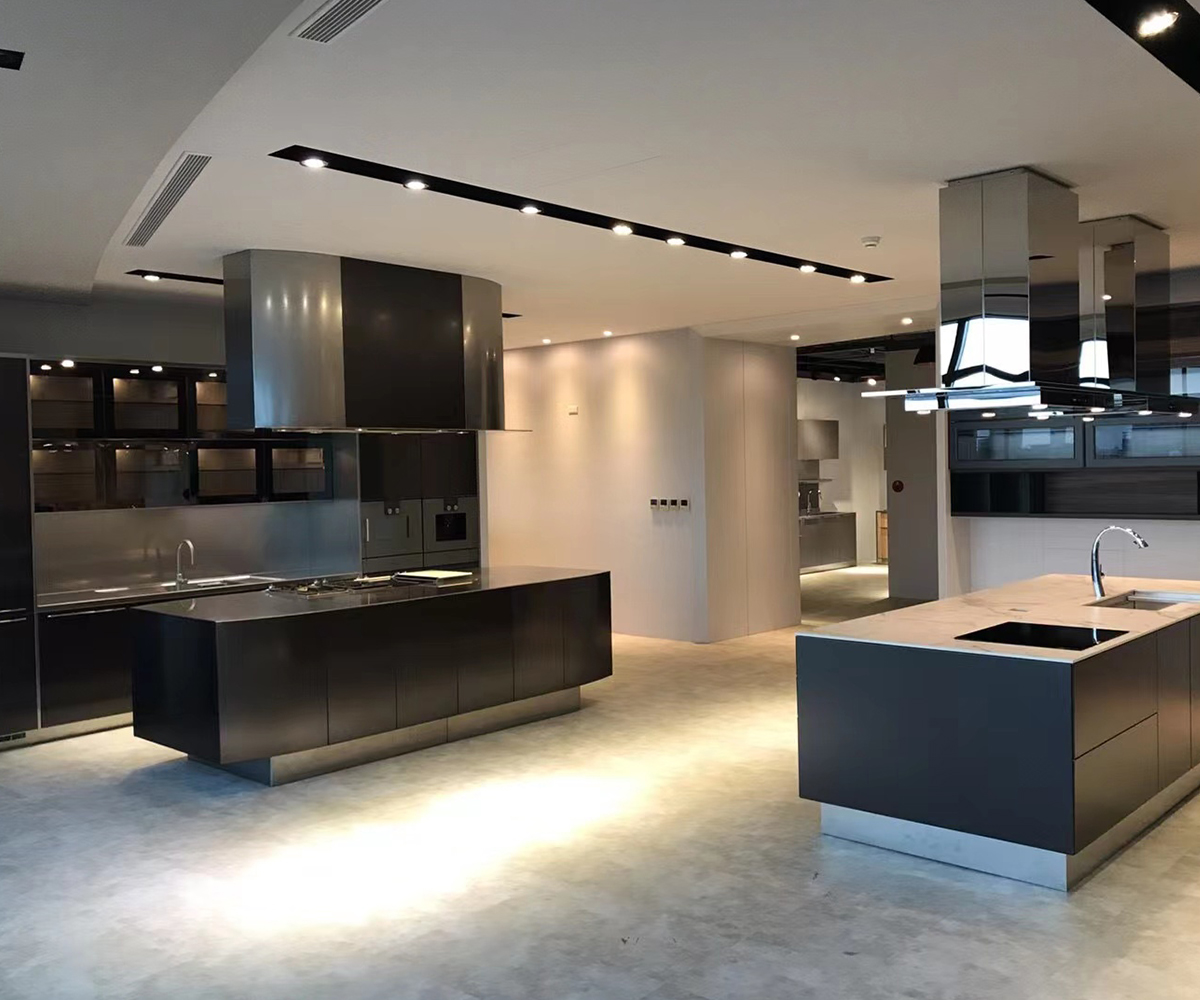
When a built in range hood is finished with an exposed metal front rather than a wrapped cabinet face, the surrounding countertops and backsplash are frequently matched in tone so the ventilation area reads as part of a coordinated cooking zone rather than a separate fixture.
Installation Process Overview
Installing an insert-based system involves more coordination than mounting a standalone decorative hood, since the cabinetry and the ventilation unit are built to work together from the start. The following sequence outlines the general order of work.
- Confirm cooktop location, insert width, and required CFM before cabinet drawings are finalized.
- Rough in the exterior vent path and duct routing before the cabinet box is assembled.
- Install the insert into the framed cabinet opening and secure it according to the clearance requirements noted earlier.
- Connect ductwork and electrical wiring, then test the blower and control panel before the finished cabinet face is attached.
- Fit the decorative front panel, trim, or cabinet vent hood face, leaving the service access point reachable for future maintenance.
Coordinating the cabinet maker and the ventilation installer early in the project avoids the most common issue in these builds, which is a duct path that was not accounted for until after the cabinetry was already constructed.
Noise, Filtration, and Maintenance Considerations
Because the insert is enclosed, sound and grease management deserve extra attention during planning. A well-insulated cabinet shell can reduce perceived blower noise, but only if the insert itself is rated for quiet operation at the airflow level required for the cooktop.
| Consideration | Typical Guidance |
|---|---|
| Filter type | Baffle filters are generally easier to clean than mesh filters and handle higher grease volumes |
| Cleaning frequency | Filters are typically cleaned every four to six weeks in a household that cooks daily |
| Sound rating | Lower sone ratings at the same CFM usually indicate a more refined blower, which matters more once the unit is enclosed |
| Duct cleaning | Long or hidden duct runs should be inspected periodically since buildup is harder to notice visually |
Design Tips for a Truly Seamless Integrated Look
A few design habits consistently separate a well-executed integrated hood from one that feels like an afterthought bolted onto the cabinetry.
- Keep the cabinet width above the insert visually consistent with neighboring upper cabinets so the hood enclosure reads as part of the run, not a separate block.
- Use the same hardware, panel style, and reveal lines on the hood cabinet as the rest of the kitchen to avoid an obvious seam where the ventilation unit begins.
- Where an exposed metal front is preferred, consider a slightly recessed or flush installation so the insert sits level with surrounding surfaces instead of protruding outward.
- Plan lighting near the hood enclosure carefully, since a large flat surface directly above the cooktop can otherwise appear visually heavy under strong downlighting.
Design note: Seamless kitchen cabinetry works best when the hood enclosure is treated as a structural element from the earliest design stage, not added after the surrounding cabinets are finalized.
Frequently Asked Questions
Q1: What is the difference between a built in range hood and a standard wall hood?
A built in range hood insert is designed to be hidden inside custom cabinetry, with only a trim panel or exposed metal front visible, while a standard wall hood is a complete standalone appliance mounted directly on the wall or ceiling.
Q2: Can an insert range hood 30 unit be used with a wider cooktop?
It is not recommended, since airflow capture decreases when the insert is narrower than the cooking surface below it. Matching or slightly exceeding the cooktop width gives more consistent extraction across all burners.
Q3: Does the cabinet around the insert need special ventilation of its own?
The cabinet itself does not need separate ventilation, but it does need adequate clearance and heat-resistant backing near the insert body to prevent long-term heat exposure to the surrounding wood or panel material.
Q4: How much clearance is typically needed above a gas cooktop?
Clearance requirements vary by unit and fuel type, but many installations fall between 24 and 36 inches from the cooktop surface to the bottom of the insert, so the manufacturer specification should always be confirmed before cabinet construction.
Q5: Is a custom wood hood liner as effective as an exposed metal front?
Effectiveness depends on the insert itself rather than the visible finish, since the wood liner is purely decorative and the ventilation performance comes from the concealed metal insert and blower inside it.
